How to raise Invoice for all flats in bulk?
There are a total of 4 steps to generate an invoice: Template creation, date and amount input, previewing the bill, and final generation. Let's go through the entire process in detail.
To look at a detailed video of how to raise an invoice, please refer to the Video Link
Template Creation
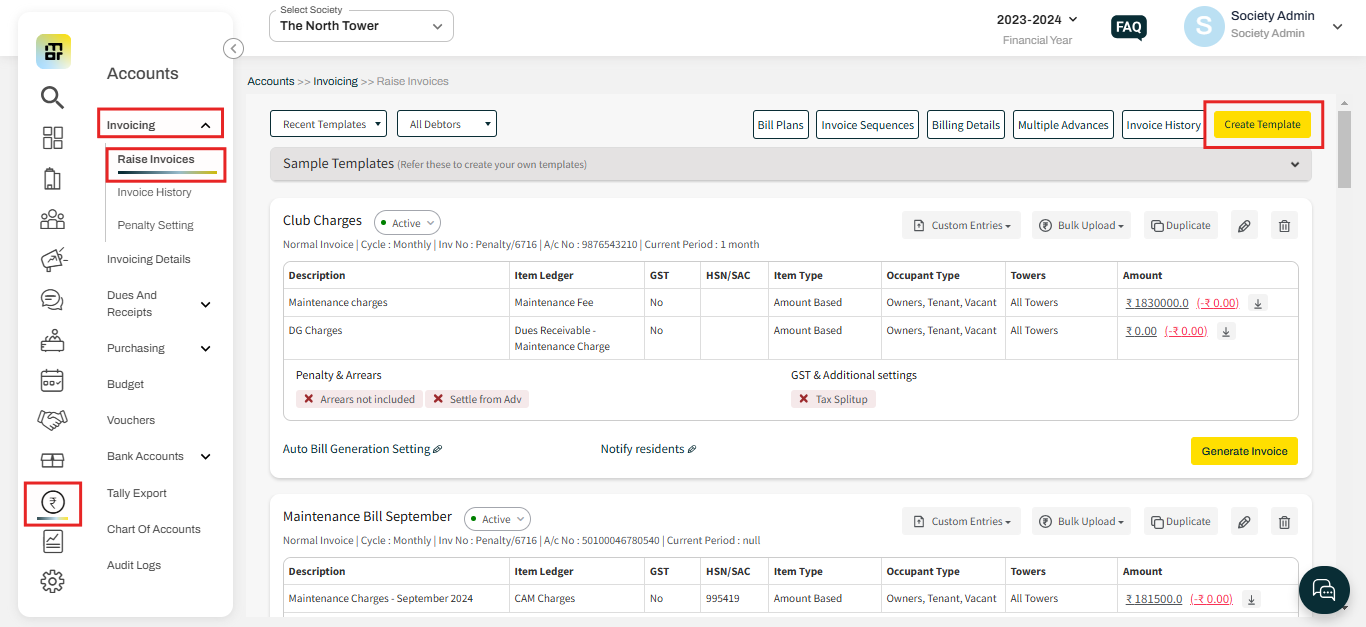
1. Select “Raise Invoices” under the Invoices option of the Accounts section. then click on the Create template option.
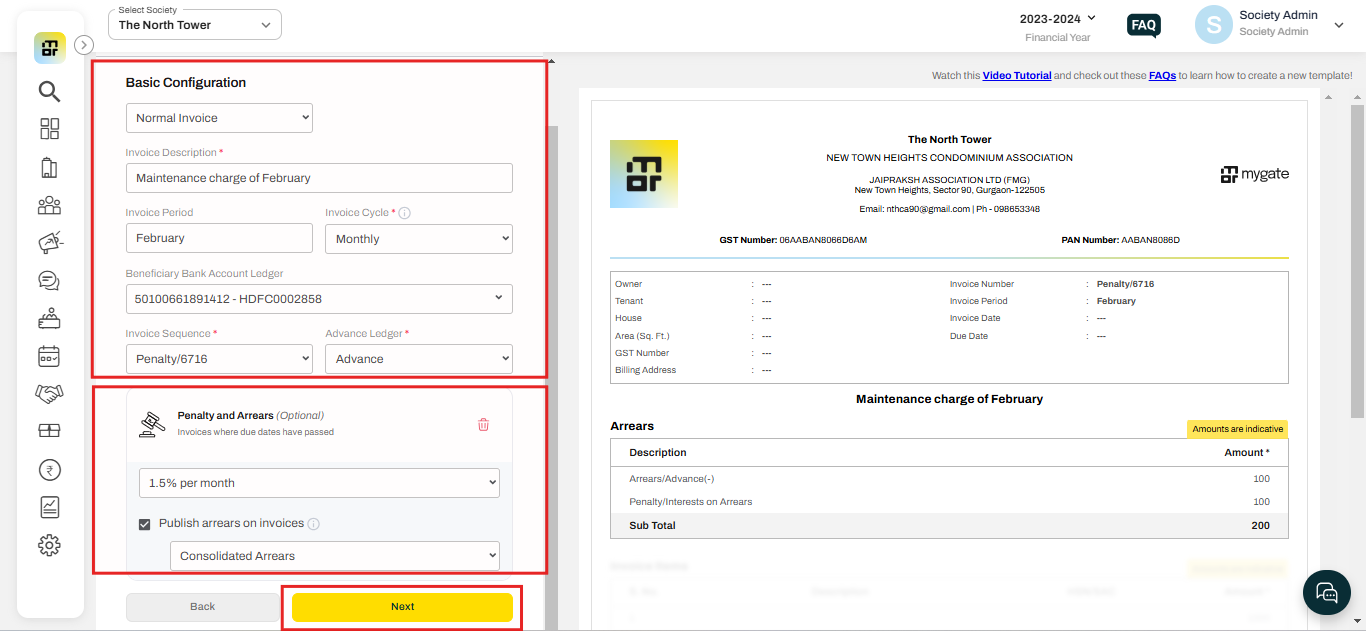
2. Select the invoice type, bank account details, and other relevant information under the Basic Configuration section. Additionally, you may include penalties and arrears if applicable. Once all details are entered, click "Next" to proceed.
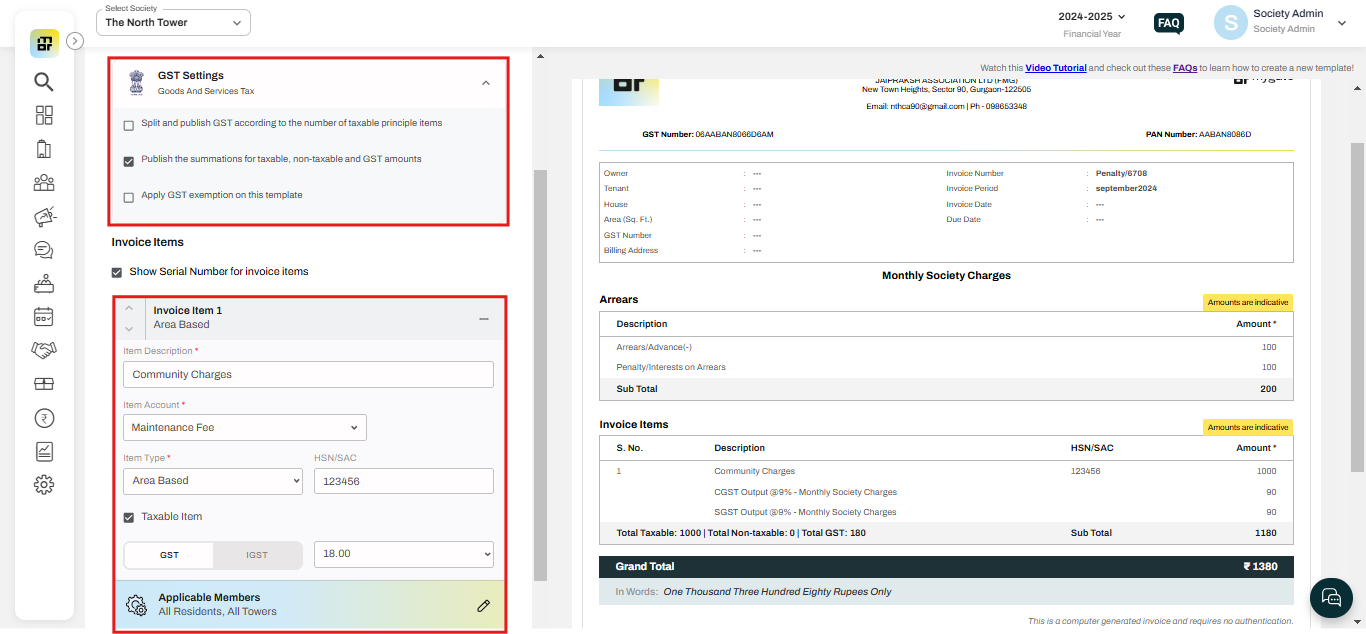
3. Add the GST settings and invoice item details, then click "Next" to proceed.
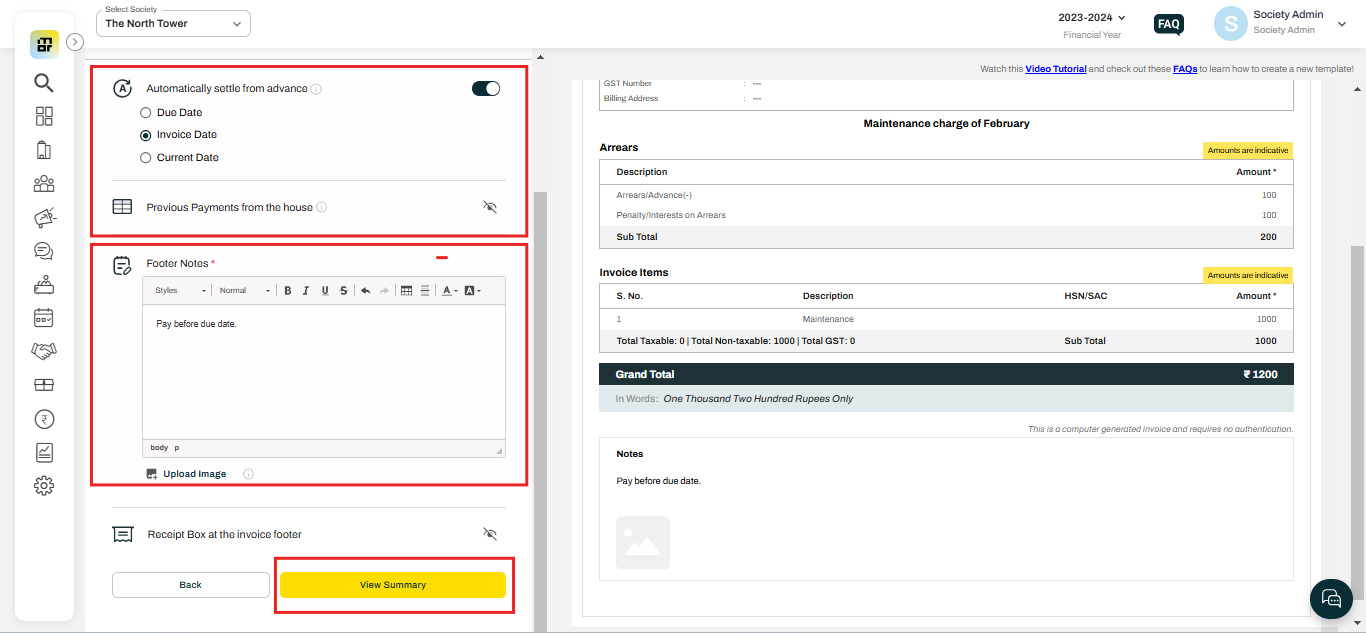
4. You can enable "Automatically Settle from Advance" and include the footer notes. Once done, click "View Summary" to proceed.
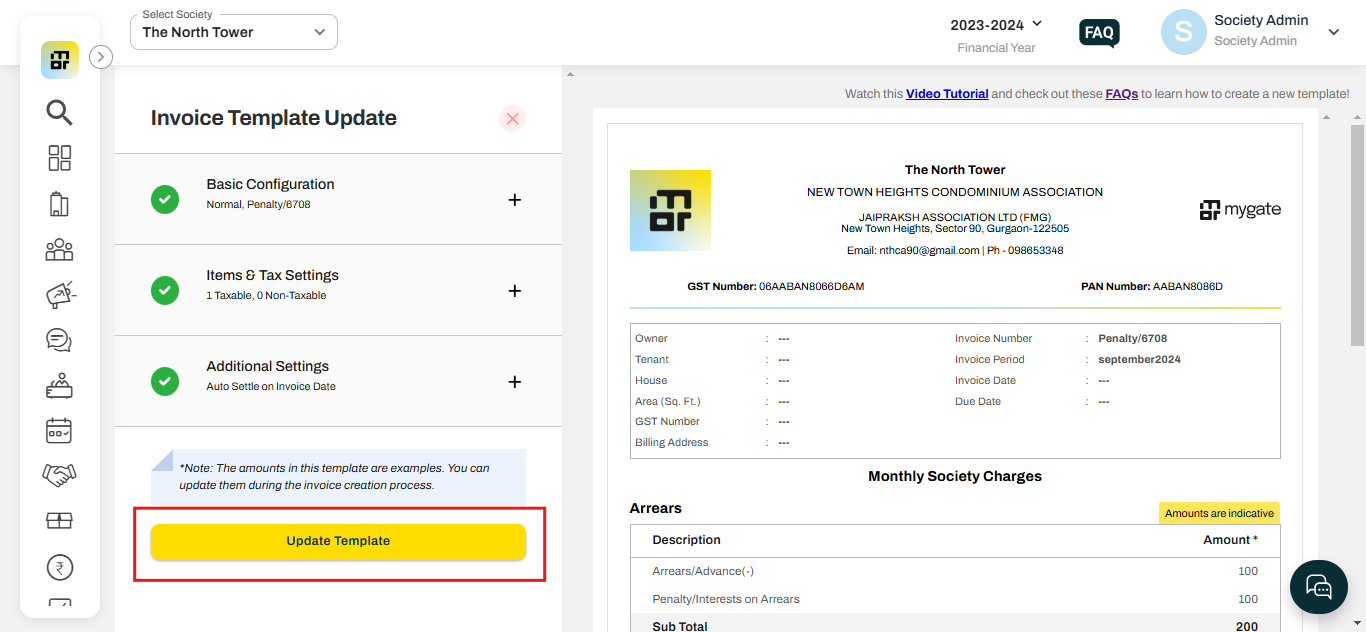
5. Click on the "Update Template" option
Configuration of Date and Amount
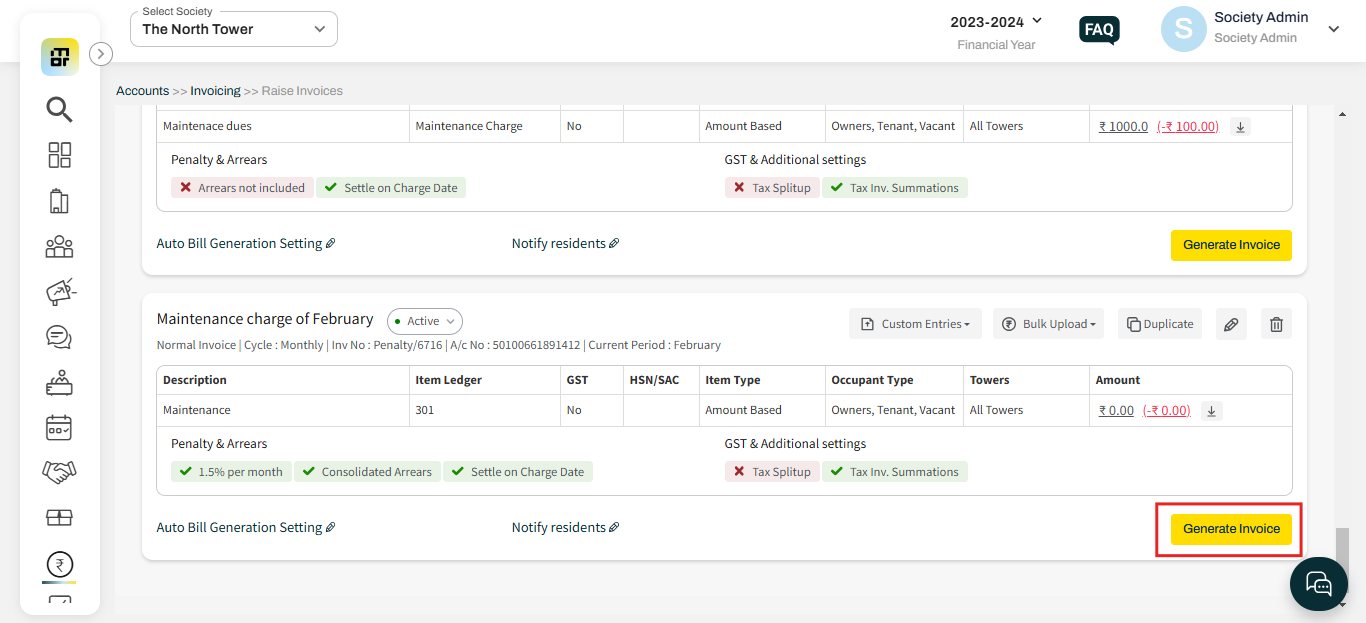
1. Once the Invoice Template is created, click on the "Generate Invoice" option.
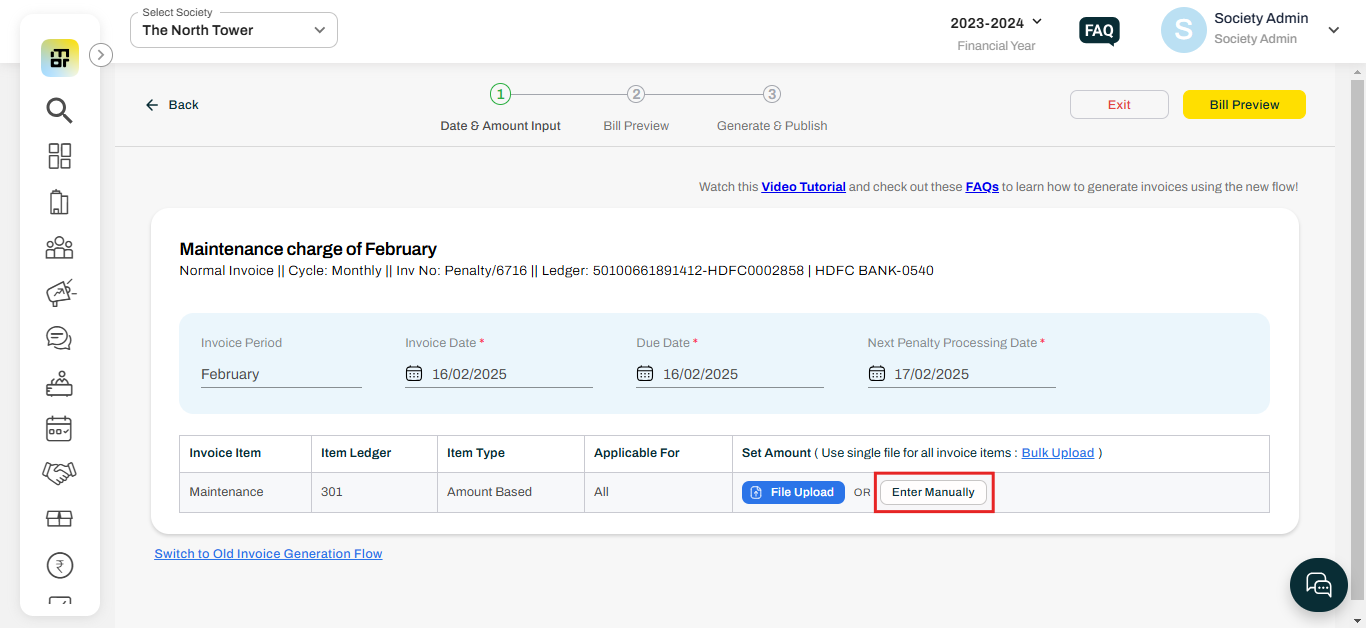
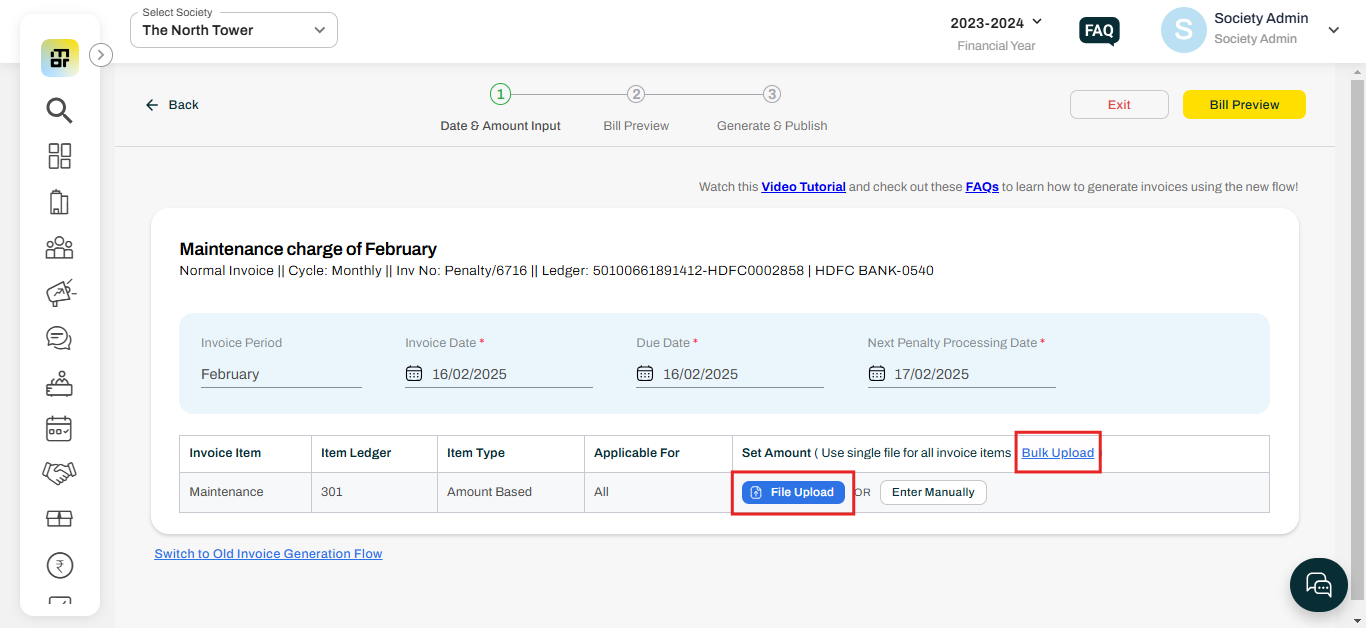
2. You can enter the amount manually or click on File Upload under “Set amount” to upload in bulk.
Manual Input:
a. To enter the amount manually, click on the "enter manually" option.
b. You can enter the amount manually against each flat.
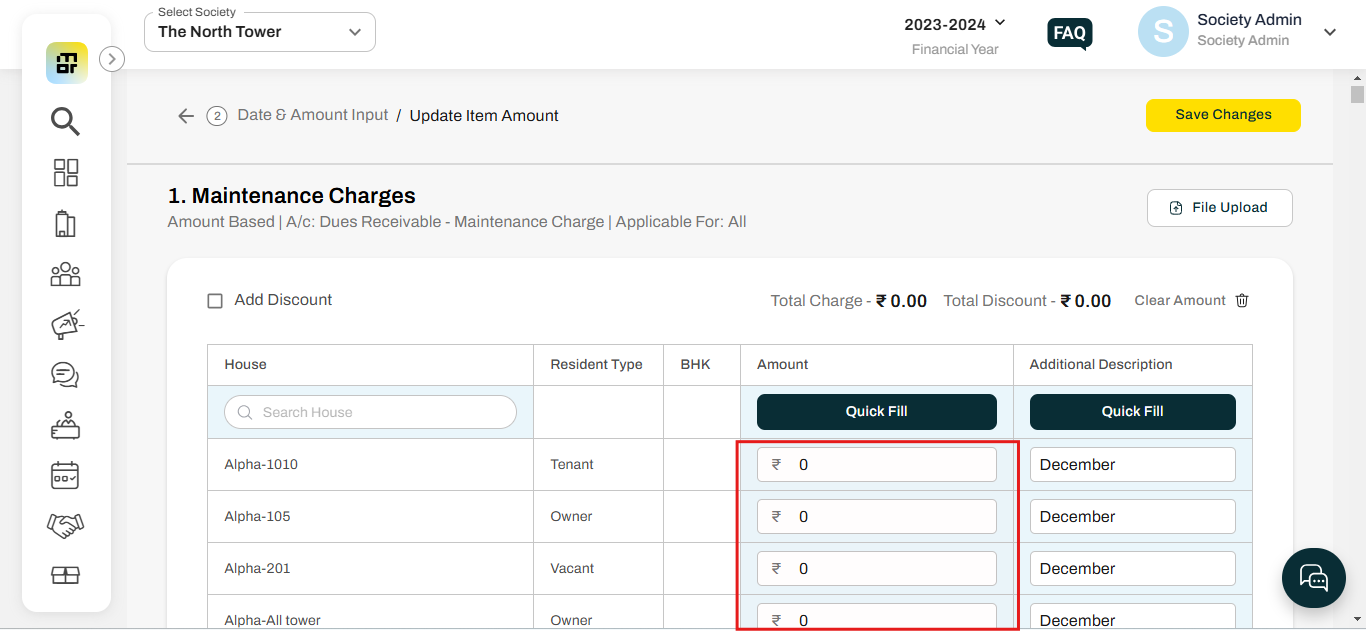
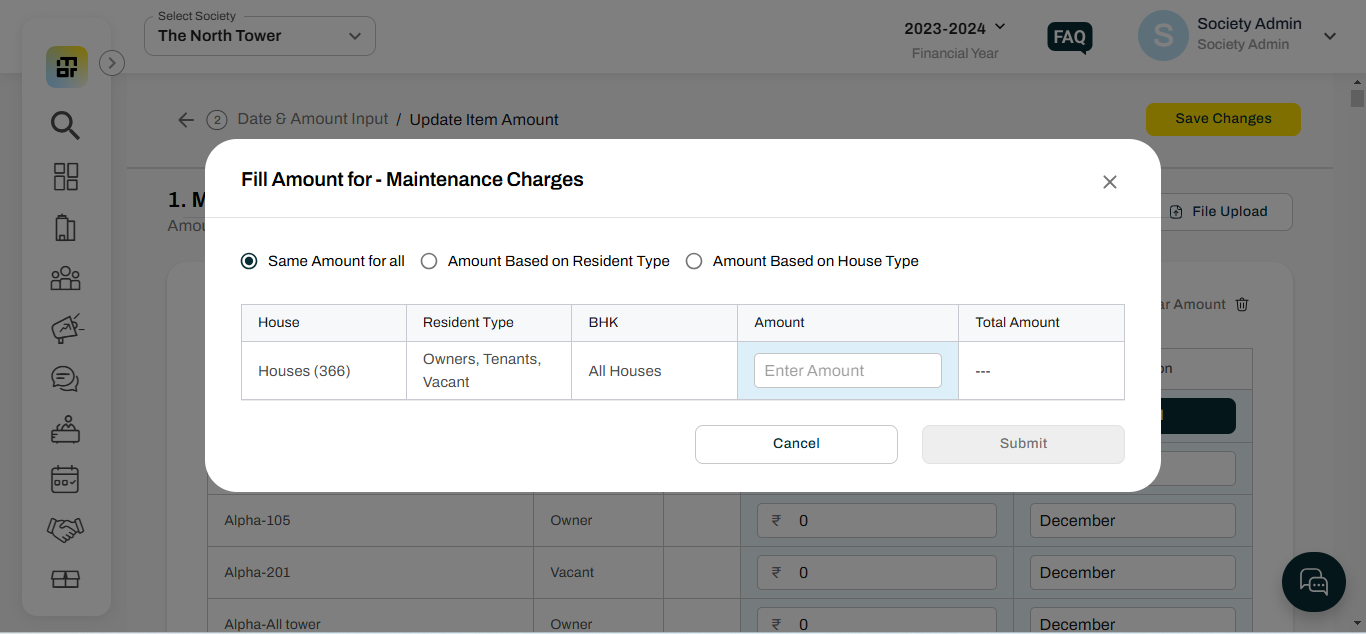
C. Click on quick-fill and select the relevant option to add the amount once for all the flats.
Bulk Input:
To upload the amount for all the charge items together, please click on the Bulk Upload option, then Download Sample File, fill in the required details in the file, save it, and then click on "Browse" to select and upload the CSV file. Alternatively, you can use the File Upload option to upload the amount in bulk for individual charge items.
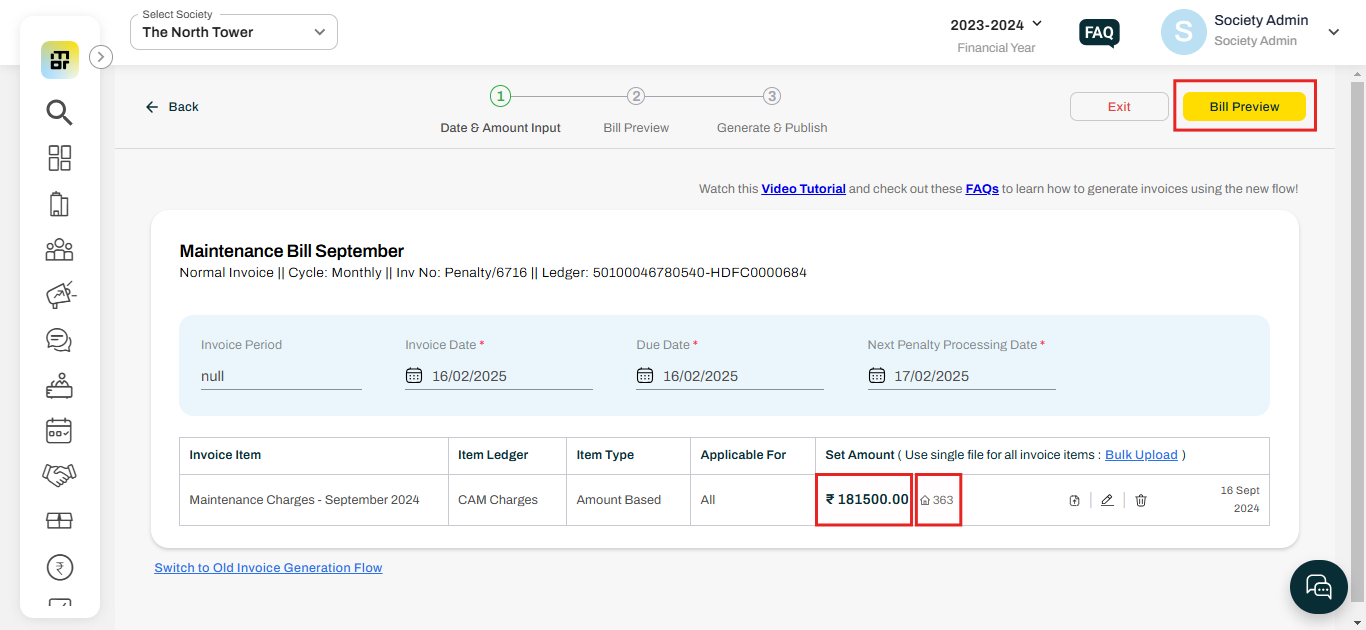
3. You can verify the total amount and house number, then click on the "Bill Preview" option.
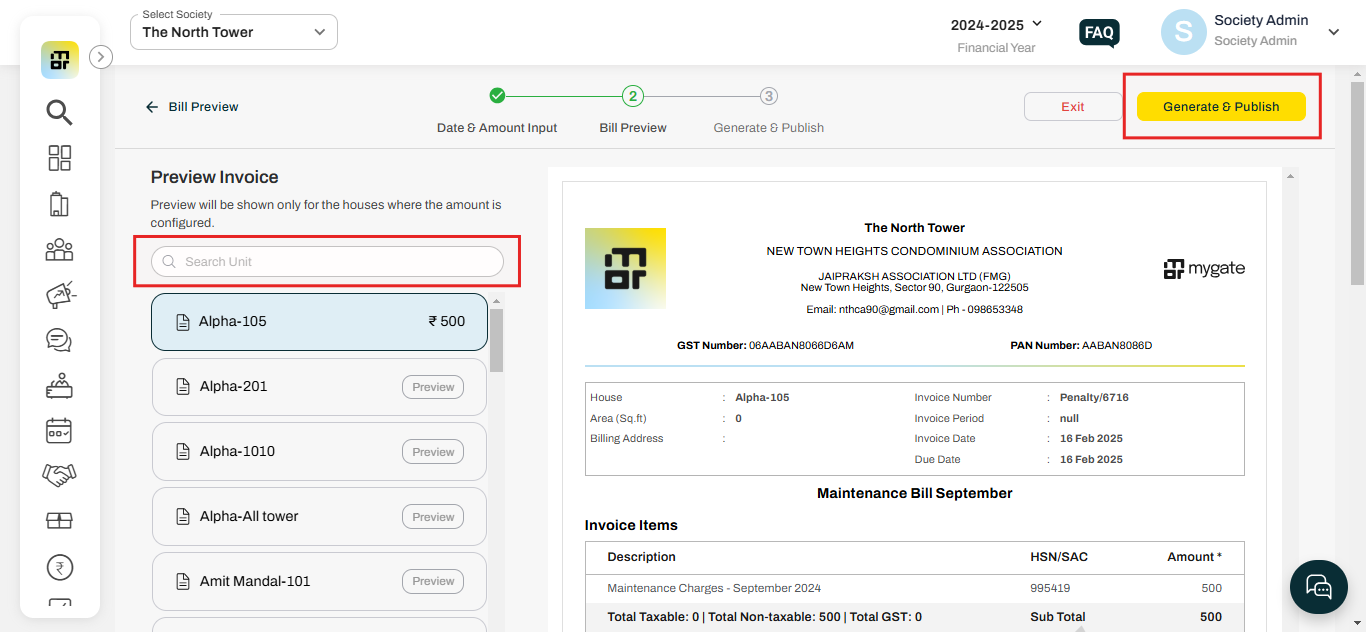
Bill Preview:
In the new preview invoice screen, you can preview the invoice for any flat by using the search option. Once you have verified the details, you can click on "Generate & Publish."
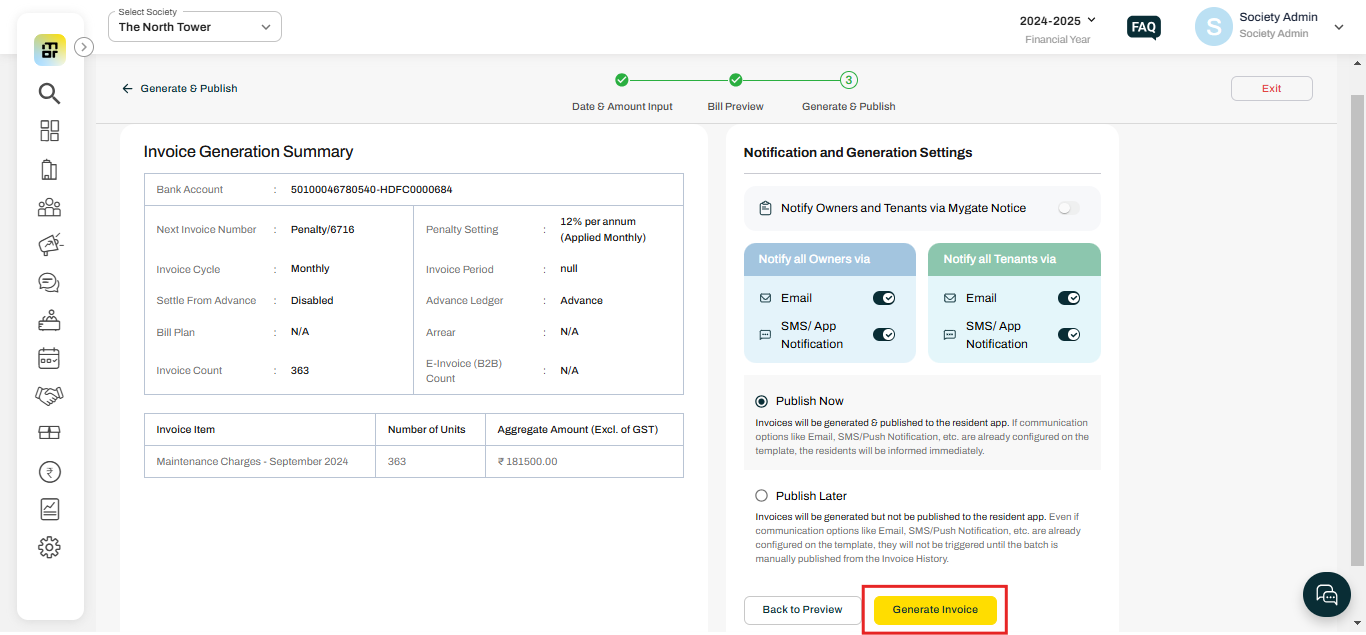
Generate & Publish:
This is the invoice summary page, which will contain the details of the entire invoice with the settings and sections you have updated. You can do a final verification here to ensure the details are entered correctly and click on "Generate Invoice".