How to setup Move-in from the admin dashboard?
Mygate allows the society to configure additional information from the residents who are moving into the society for the first time. Society admins will have full control of the details they want the residents to submit before they move into the society.
When a resident is moving into a new flat, they can submit a Move-in request through the Mygate Resident application by selecting the "Move-in" option during registration. In this case, the society admin will receive the approval request under the "Move In Move Out Requests" section. Mygate provides society with an option to configure the Move-in process for the residents so that users need to submit the mandatory details while raising a Move-in Request.
Configuration:
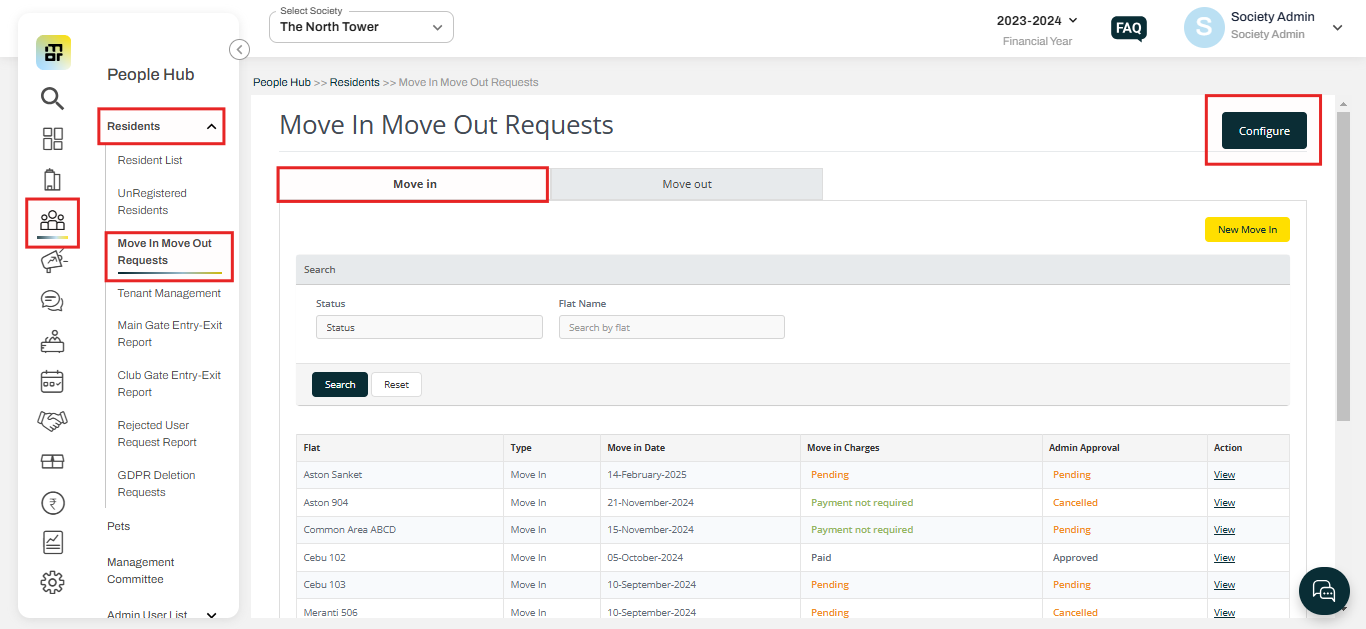
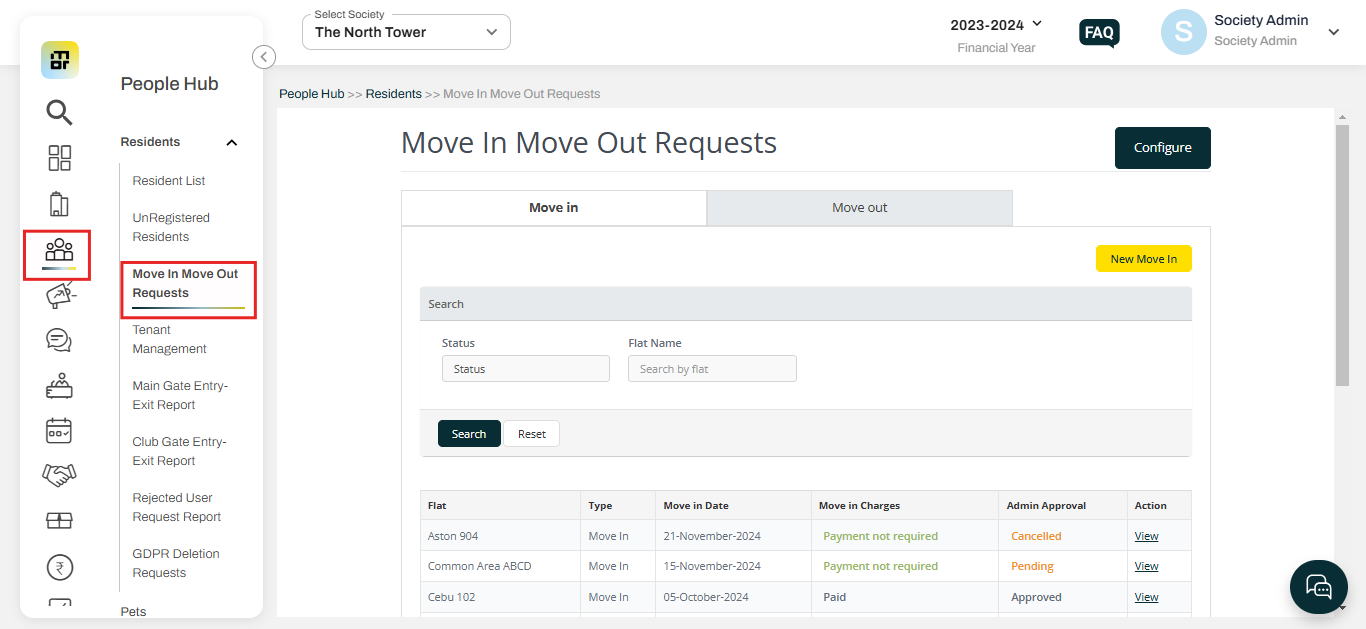
Go to People Hub, and select Move In Move Out Requests under Residents. Click on Configure.
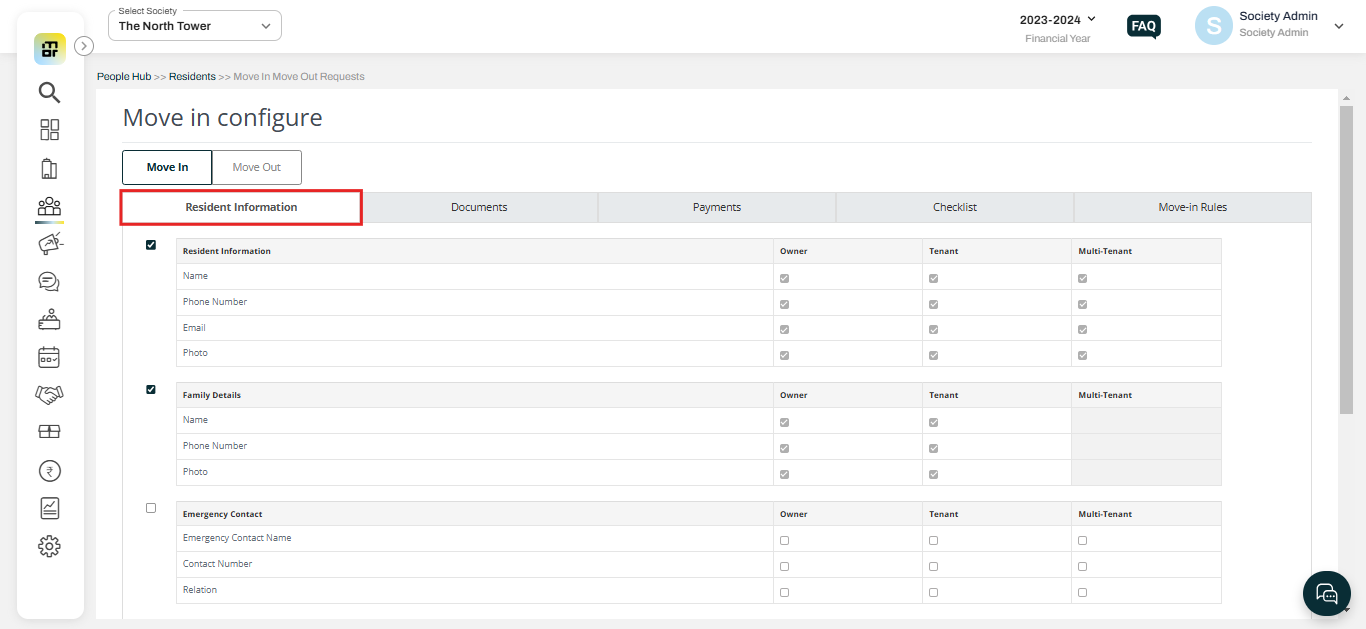
Resident Information:
The society can make it mandatory for all residents to provide details such as resident information, family members, emergency contacts, vehicles, and pets when submitting a Move-in request. These details can be enabled or disabled depending on the requirements of the society.
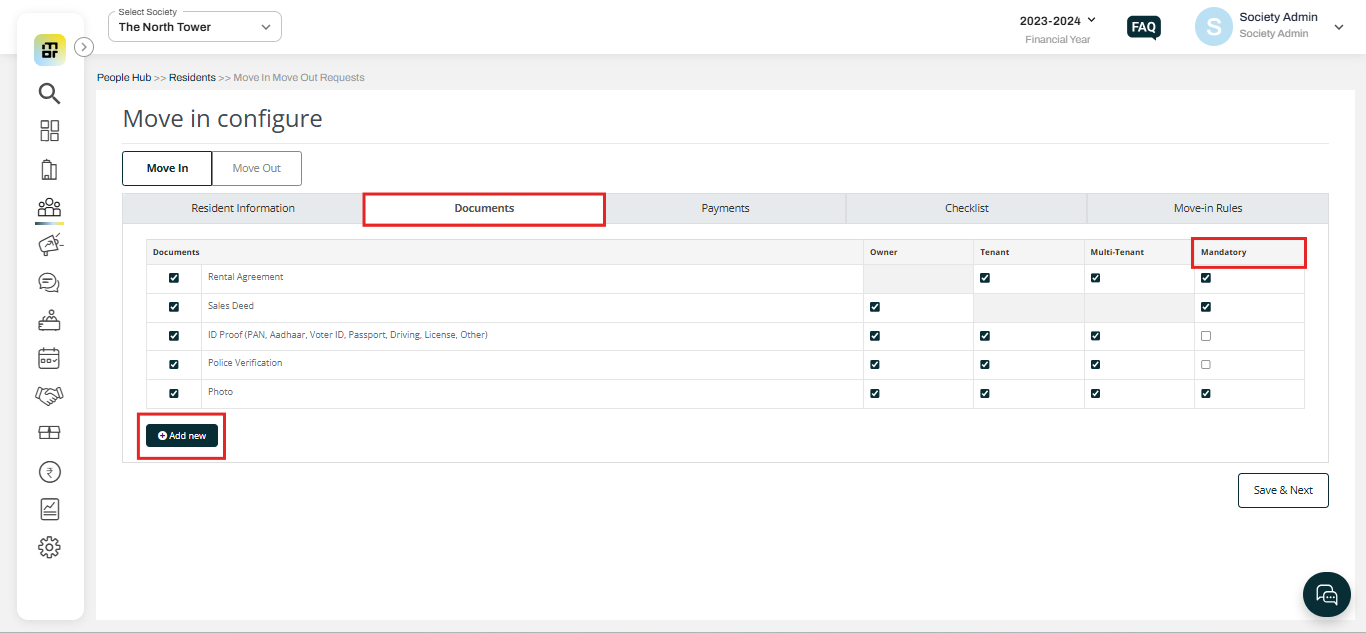
Documents:
MyGate enables the society to configure the required documents that residents must submit when making a Move-in request. The Society can set these document submissions as either mandatory or optional, depending on the user type. Additionally, the society has the option to add new documents as needed. The process is customizable, allowing the society to configure document requirements based on the user type. This means that the required documents can be different for owners, tenants, and multi-tenants.
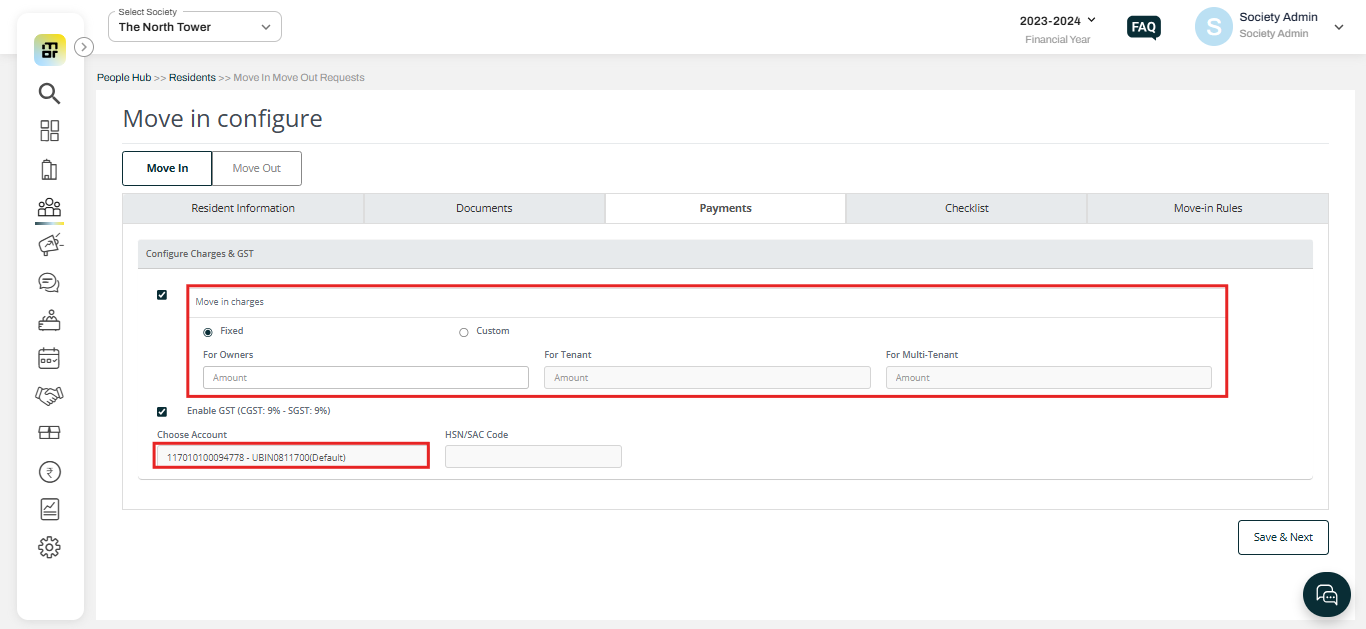
Payments:
The society can configure Move-in charges and bank account details as part of the move-in process. Additionally, the society has the flexibility to add different charges based on the user type.
Check-list:
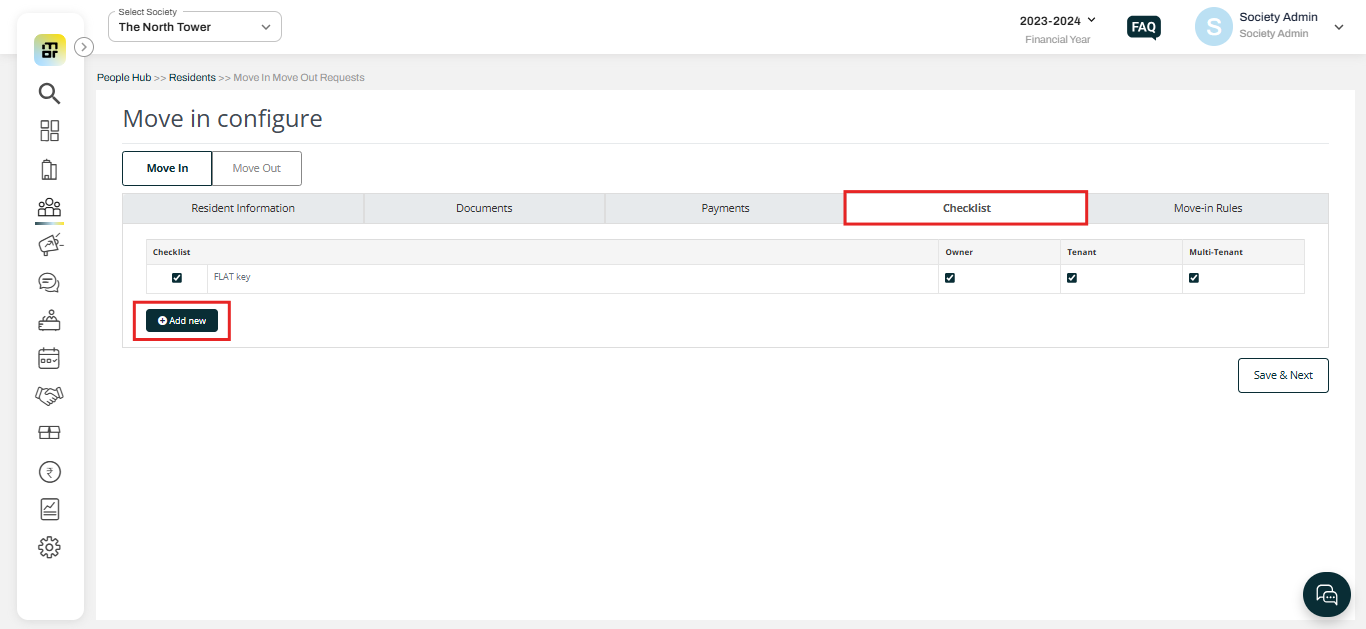
The society can create checklists for residents to complete before submitting the move-in request. This is customizable, society can create and make this either mandatory or optional as per the different user types.
Move-In Rules:
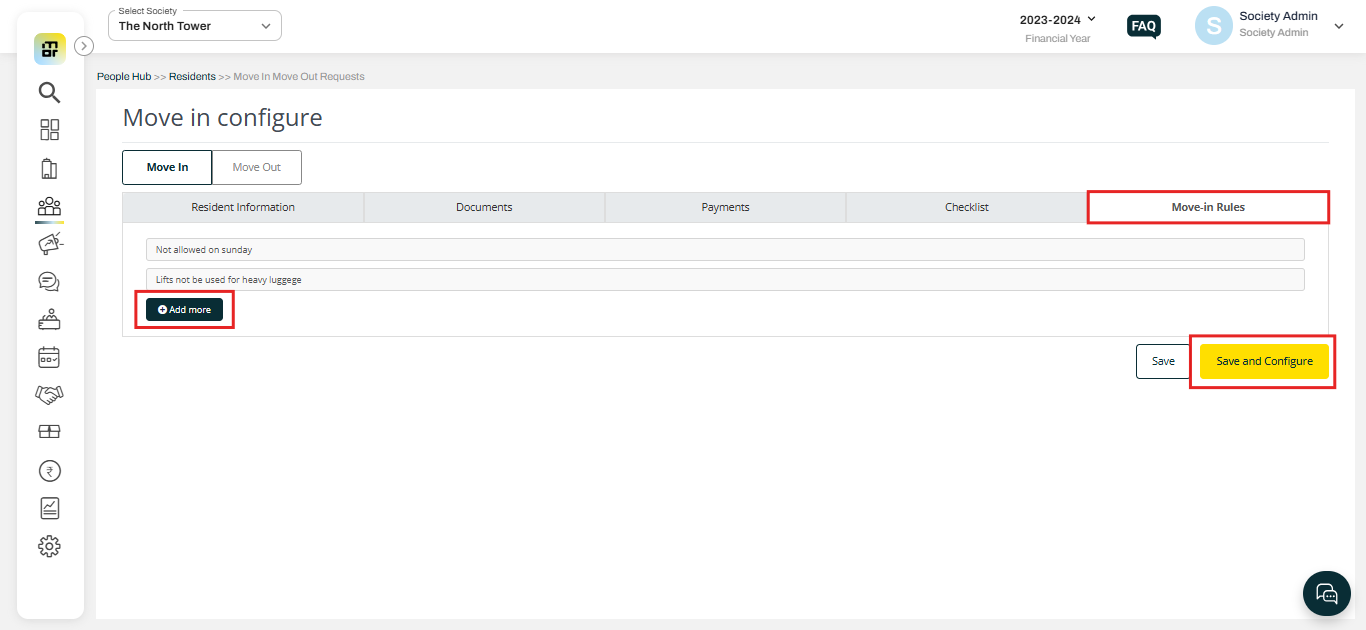
The society can configure specific move-in rules for the process. Residents will only be able to submit their Move-in application after they click on "Agree to the Move-in Rules," ensuring they acknowledge and accept the set guidelines.
Once the set-up is completed, click on the "Save and Configure" option to save the changes.
Approving Requests:
Once the configuration is completed, the residents will select the moving-in option while raising the registration request and it will process to the form set up by the admin. The Society Admin and Society manager can approve the Move-in request by logging in to the Web dashboard only. The move-in request is not accessible in the Admin console to approve.
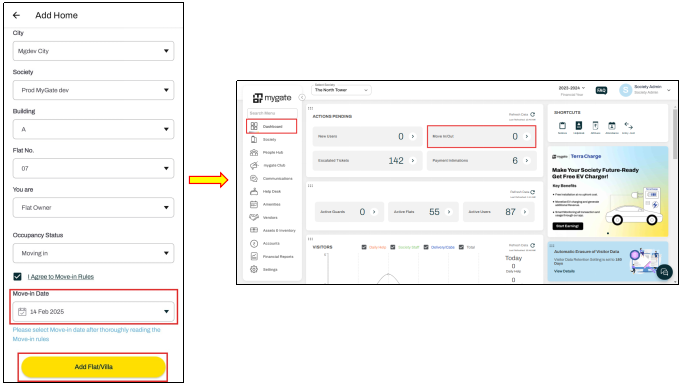
To approve the request please refer to the following steps:
1. Select “Move In Move Out Requests” under the Residents option of People Hub.
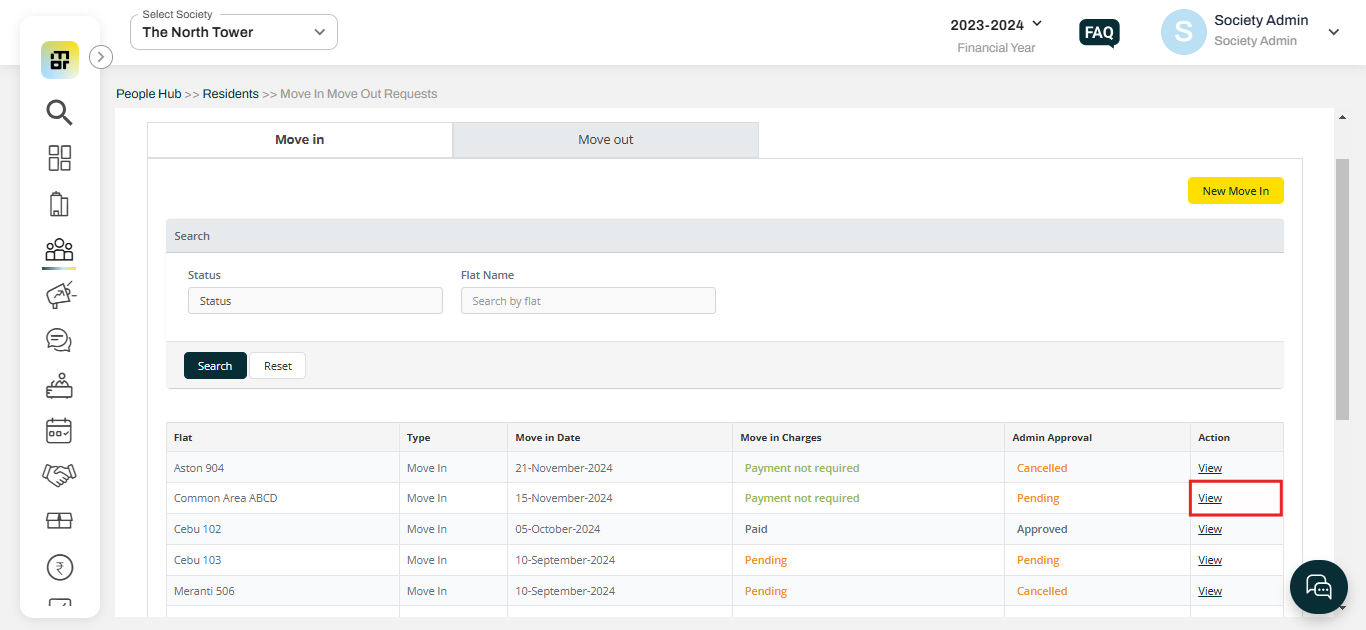
2. Click on “View”
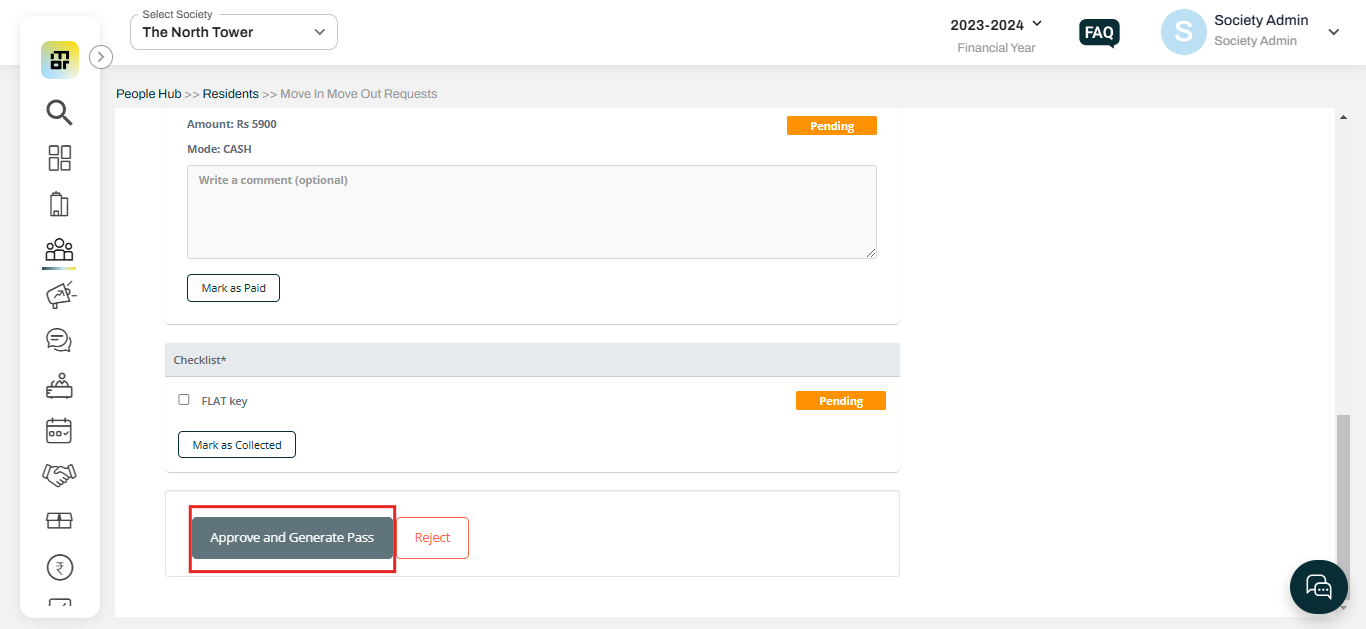
3. Verify the details and click on "Approve and Generate Gatepass" to approve the request.
Note: Please ensure that the move-in request is approved before the move-in date selected by the residents. Once the Move-in request expires, the society admin will no longer have the option to approve it. In this case, the resident needs to delete the Move-in request from the application and raise a new request.

